Jul
Remember last Christmas, indulging in all the festive deliciousness and oops you chipped a tooth! Just like so many things, you put off going to the dentist, the tooth gets worse and worse until suddenly you’re in agony. You realise you should have got it sorted straight away plus it’s going to cost you twice as much! Well, render is just like that chipped tooth. As soon as you notice a crack, a bulge or blown areas, get it seen to as it will only deteriorate, cause more damage and cost you more to repair.
NOTE: This is a generic guide, repairs should always be carried out by a fully qualified renderer who follows the guidance from the material manufacturer given on the specific product
Assessing the Damage
Damaged render can come in the several forms:
- Cracks (large or hairline)
- Bulging areas
- Blown render (this means hollow render when it no longer adheres to the substrate behind)
- Render that has completely fallen off and exposed the brickwork behind.
Any of these symptoms should be dealt with straight away. With new builds or extensions, you will find settlement cracks can appear and as the wall behind moves so will the render. Winter is not render’s favourite season since if you already have cracks in your render they can develop with frosty/icy conditions. When moisture seeps into cracks it can freeze and expand, worsening the crack. If the damp/water becomes trapped between the render and wall it can then blow the render loose. Once moisture and damp have entered, it can also penetrate in the solid walls and brickwork causing further complications. Also be aware when you mix your render that the material is not too strong since this can lead to shrinkage and subsequent cracks.
Hairline Cracks
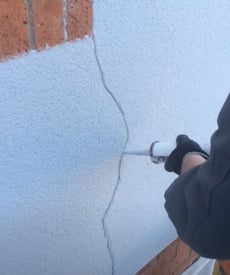
Repairing hairline cracks is far easier than patching a much larger area of render which it can lead to if you don’t fix the initial problem. Weber have a fantastic video that runs you through the repair process. These are the steps you should follow to repair a hairline crack:
- Thoroughly clean the area and allow 48hours of drying time
- Using a mini disc cutter or oscillating tool, run a cut through the crack to slightly increase the width
- Mix (for example) weberpral M with weber accelerateur monocouche at a dose of 100ml per 25kg bag. Then mix in a dilution of 2 parts clean water with 1 part EVA or waterproof external grade PVA. Ensure an exact ratio to keep the colour correct
- Use a cartridge gun to apply the mix, cutting the nozzle to match the width of the crack.
- Apply a bead of the mixture into the crack ensuring you DO NOT overlay the existing render and just allow a 2/3mm nib to protrude over the filled crack.
- Allow to dry for 20-40mins (no longer as it will compromise the shade of the render) and remove the nib with a small filing knife.
Patch Repairing Render
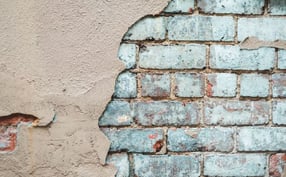 Localised render repairs are the most common. You should always ensure that you are matching your render as best as possible to the existing material. For example, you should NEVER use a cement-based render to patch a lime render property. Lime render is more breathable hence it is used on older period properties. If it is replaced by a cement version it will prevent moisture evaporating from the wall and force this moisture to the edge of the new patch causing it to fail. Here are some simple steps to follow to patch repair blown or failed render:
- Hack off the failed render using a claw hammer or a small breaker with a cranked (angled) chisel if dealing with a larger area. You should do this carefully so as not to damage the existing wall beneath.
- Work outwards from the damaged area until you reach the sound render. You should be able to identify blown render by tapping a hammer over the render and listening for a hollow sound
- Remove any dust and debris so as not to compromise the new render
- Fill any holes or deep depressions and repoint the wall if necessary. This will create a flatter surface and ensure render is applied at the same thickness.
- Apply an SBR primer to encourage the bond and prevent the wall sucking all the moisture from the render.
- Apply the render as you would ordinarily using a hawk and trowel and finishing with an I-bar, scratcher or float. When applying and finishing, concentrate on pushing in and bonding the edge of the old render with the new to create a seal.
Always remember to follow product guidelines for specific application guidance and curing times. For guidance personal to your job and to purchase rendering to support your render repair job contact CES on 01494 715472.
