Mar
Perfectly finished render is a thing of beauty right? With rendered homes having a real boom in popularity right now take a look around and you’ll spot heaps; from modern extensions, to giving a old, traditional home a facelift.

As well as looking smart, render also has very practical qualities such as protecting your home from the rather unpredictable British weather (take a look at some of the other advantages of render here). To achieve that flawless finish, it is essential you complete every step of the rendering process properly including those final stages.
What tools do I need?
When it comes to finishing your render there are a few essential tools:
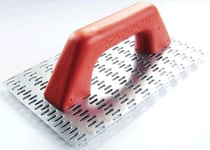
- Scratcher/scratch float/render scraper (all different names for the same tool)
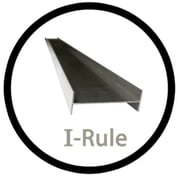
- I-Bar/I-Rule
- A soft bristled brush or broom
How do I know my render is ready to scrape?
Render curing times varies hugely depending on temperature, humidity and air flow. It is also worth remembering that render should not be applied below 5°C and above 30°C as well as avoiding application in direct sunlight. Your product bags/technical info will give you a rough guide on drying times e.g. K Rends K Mono monocouche states a window of 3-24 hours and Weber Pral M specifies 5-16 hours. However, it is important to get to know your product for yourself and recognise the signs that the render is ready to scrape. You are looking to scrape once the render is green which means it is set but not fully hardened. In moderate weather conditions you will often find renderers spray in the afternoon and then scrape the next morning. In warmer weather, it is possible to scrape the same day. Within that larger 5-16/3-24-hour window, you will find there is an ideal 2-3 hour opportunity. This will be the point when a thumb impression cannot be made but the render can still be marked by a thumbnail. You will also find the render can be scraped without clogging your scratcher.
Green means go
So now your render is green, it’s time to scrape. The I-bar/I-Rule is a great tool to start with. Helpfully named an I-Bar due to the ‘I’ shape, this long ruler shaped tool will cover a large area of wall as you scrape to create a flat finish. Use your body to push the I-Bar over the render, removing that top layer of laitance (laitance is the weak, milky or powdery layer of cement dust, lime and sand fines that appear on the surface of concrete).
Next, you’ll need that somewhat perilous looking tool, the scratcher or scratch float. This float is designed with a bed of sharp nails to quickly and evenly scratch back your render. Having applied your render at around 18mm, you’ll be removing 2-3mm for a 15/16mm finish. The scratcher should be operated in light circular movements to create the perfect surface. It is worth having a brand new, sharp scratcher in your tool kit in case your caught out with an overnight set which unexpectedly cured more quickly.
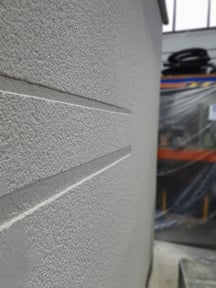
It is important to perform a thorough scrape as miss marks will be obvious, often showing a slightly lighter patch of colour. Tinted safety specs can help with this as they help you spot miss marks a little better. Consistency is key in so many aspects of rendering and this includes scraping. You should be scraping at the same time point for all surfaces on your project. The reason for this is because when you scrape a little earlier, you’ll achieve a deeper texture and therefore darker colour. When you scratch later/too later, you’ll notice a lighter shade. It is imperative to get these timings right, especially with adjacent walls than can end up looking to be contrasting colours. Finally, it is essential to brush down you surface to remove any final loose aggregate. Brush both horizontally and vertically to produce a smart, clean finish.
 New to the trade?
If you're new to the trade or perhaps just starting out on your spray render journey, CES are always here to help with our rendering, machines and servicing. With training offered when buying machines from us and our servicing department available to keep your machines in tiptop condition aswell, we’re keen to help your business succeed. We also have great partnerships with both Weber and Baumit who offer superb courses if you’re just starting out or need to brush up on those render skills.
