Mar
Straight down the Line
The quality of your paint lines is what separates you as a professional painter from the amateur. When clients are after the latest trend that they’ve been eyeing up on Pinterest/Instagram/the latest Channel 4 renovation show, you need to deliver that dream. This where painters tape gets the call up.
Painter’s tape is different to masking tape (check out this blog for more on this) and is worth the investment if you hope to achieve the cleanest and crispest lines possible. At CES we stock a range of painter’s tapes from painting professionals Deltec; find out more about the tapes here.

Put Up A Barrier
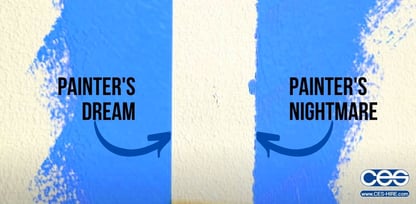
When you are painting contrasting colours beside one another, you need a barrier. I don’t know about you, but my hands are not steady enough to create a laser sharp painting edge (and that’s just after one coffee let alone a glass of wine) so here’s where painters tape steps in. It is incredibly frustrating when you peel off your tape to find an awful bleed and/or the tape has peeled off some of the original finish. A quality painters’ tape will ensure you have no dreaded seepage and the tape peels away without damaging the original surface. So, you’ve got your painters tape but what are the ultimate tips and tricks that will guarantee the sharpest lines?
 Look Sharp
- Invest in quality tape. The quality is reflected in the price as painters’ tape is more than bog-standard masking tape. However, you get what you pay for since painters’ tape has innovative technology that creates that barrier to prevent the paint seeping underneath.
- Choose the correct tape. Many brands, such as Deltec have a range of tapes for a variety of surfaces including sensitive or extreme So, whether you’re working with wallpaper, fresh paint, rough or moist surfaces there will be a tape to suit the job.
- Remove any dust and dirt from the surface you are applying the tape to. This will ensure maximum adhesion and less chance of paint bleed.
- Do not touch the adhesive side of the tape since oils from your hands and other dirt and debris can contaminate the adhesive. This can reduce the bonding and mean potential gaps where bleed can occur.
- Use a fine and rounded edge to secure the tape firmly to the surface. This could be as simple as running a credit card along the edge of the tape or a tool such as a putty knife will work well. You need to use an edge that isn’t too sharp since you run the risk of simply piercing the tape. Be sure to squeeze out any air bubble or gaps that can lead to a paint bleed.
- Allow the adhesive to cure for a few minutes before grabbing that brush or paint spray machine. This allows for time for the bonding technology to really work.
- When it comes to the paint, less is more. If you use too much paint, not only does it compromise the finish but it also can cause that frustrating bleed. Ensure your paint spray machine settings are correct and always test before spraying onto the taped area. If painting by hand a brush can be preferable to a roller since the pressure of a roller can often push the paint beneath the tape.
- Tape removal is a controversial topic since some painters are adamant to remove whilst the paint is still wet. However, if it is too wet is can compromise the finish as it may not be dry enough to remain smooth. Equally, if the tape is left too long the glue bonds more to the surface and it can be trickier to remove and even peel away some of the original surface. With experience, you’ll get to now the right time and of course this can also depend on the type of paint you’re using, the temperature and the surface you’re painting on to. It’s best to wait until the paint is touch dry which is usually at least an hour after paint application.
The above tips should be enough if you have invested in a quality painting tape. However, I have two more tips that are commonly used to absolutely ensure that crisp line especially if you’re hoping for a design like this…

- Many decorators are familiar with this trick. Once setting up your tape, paint over the edge of the tape on the side to be painted with the original surface colour beneath the tape. This means if any bleed occurs it will match the original paintwork plus it gives a great extra seal to the tape. Once this colour is dry, apply your new contrasting colour.
- Another frequently used hack is running a thin bead of caulk/sealant along the edge of the tape where you are hoping to achieve your crisp line. Smooth the caulk out with your finger and let it dry before applying paint. This works well particularly with rougher surfaces since the caulk seals the edge and prevents any seepage. It is really important to remember to remove the tape before the paint/caulk dries out.
Painting With CES
Did you know CES stock a range of paint spray machines available both for hire and purchase. We also supply accessories for these machines as well as those all-important items for painting prep including your tape and film for protecting surfaces from any paint overspray or spillages.
