Nov
In the last decade, plastering tools have really evolved. There are now multiple options when selecting tools for applying and finishing plaster as well as a range of price points that make the trade accessible to many. With the introduction of flexible blades as well as lightweight plastic designs, the way we plaster has changed entirely with an emphasis on increasing productivity whilst decreasing fatigue. Here are our recommendations on the essential tools for plastering.

Pre-Application
Power-mixer
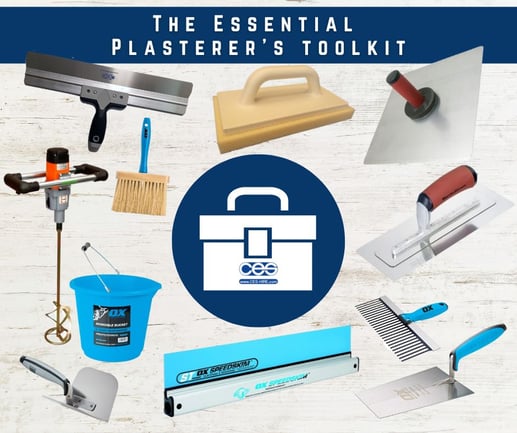
The power-mixer, also known as a paddle mixer or whisk, is the perfect tool to get your plaster mixed to the smoothest consistency ready to apply. Back in the day, this process would have been carried out by hand using a spade. However, with the advancing of technology, this process is now much quicker and easier with the aid of a paddle mixer such as the Alfra Eibenstock.model. This powerful and lightweight mixer will not only mix plaster but also:
- Render
- Gypsum
- Lime Concrete
- Cement
- Thermal Insulation materials
- Insolents of medium to high viscosity
Mixing Bucket
Whilst this may seem a very simplistic and obvious piece of kit, a mixing bucket is essential and a great multipurpose item. We would recommend you have a couple of 15 litre buckets. The first one should be a substantial and robust bucket to mix the plaster in with your whisk so needs to big enough to allow movement whilst mixing this bulky item. When mixing, you should always ensure your basket is completely clean so as not to contaminate the plaster. Secondly, you’ll need a water bucket to clean your tools. To keep your tools in the best shape possible it is always worth washing immediately after use to prevent the plaster drying on and hardening. There are a range of buckets available at CES, take a look here >
Plaster Application
Hawk
A hawk is that key item we picture a plasterer holding (alongside a trusty trowel of course). A hawk is a very handy tool since it essentially is a portable storage plate for your plaster when transferring from the bucket to the wall. To prevent the need to constantly bend down to the mixing basket, the hawk relieves the extra stress on your body as well as making it easier when plastering hard-to-reach area such as ceilings. remember , plaster is heavy especially when working with it for hours at a time therefore we would recommend looking for a hawk that is:
- Lightweight
- Aluminium plate (prevents rusting)
- Comfortable hand/soft grip
- A square 13-14” square plate
- Take a look at CES options here >
Bucket Trowel
The bucket trowel goes hand-in-hand with a plasterer’s hawk and really does what it says on the tin. The construction industry is particularly responsive and designs tools to respond to the builders needs, hence the bucket trowel which essentially is used to scoop out material from the mixing bucket. Plasterer’s will transfer the material from the bucket to the hawk using this tool. It is shaped to remove all the plaster from the bucket to reduce wastage. You needn’t spend a lot on a bucket trowel, however select one that has:
- A robust steel blade
- Approximately a 7” blade
- Rounded edges
- A comfortable and soft grip handle
- Explore CES options here >
Plasterer’s Trowel
A plasterer’s trowel is used to apply the plaster to the wall or ceiling. The plasterer will almost slide the material from the hawk on to the plasterer’s trowel and to the wall. This is done in one swift movement that looks easy but of course takes practice to perfect this skill and perfect the correct amount of plaster on the blade surface. This flat blade will spread and smooth the plaster across the surface. You will need to break in your trowel to prevent sharp edges from cutting into the plaster, alternatively you can purchase pre-worn trowels which will cost more but avoid the sharp edges. We would recommend:
- Stainless steel blade-for a more durable and rust-resistant tool
- Pre-worn (if budget will allow)
- Comfortable soft grip handle
- Lightweight
- If starting out start with a smaller blade (blades can vary from 11-18”)
- Shop Plasterers Trowels here >
Corner Trowel
As I previously mentioned, in construction a tool is invented for every purpose. This of course was designed for application of product in corners. With experience corner-work becomes easier, however it is a tough and fiddly area to get right. The corner trowel is shaped to apply plaster to both internal and external corners. Investing in this product with improve the quality of your work and overall appearance of the walls. Shop corner trowels here >
Scarifier
A scarifier looks rather like a giant’s comb and is used to comb through the initial layer of plaster to scratch up the surface before a second layer is applied. This creates a key that ensures a much stronger bond between the first and second layer of plaster.. Take a look at the OX Pro Scarifier here >
Plaster Finish
There are so many options available to finish your plaster so it really comes down to what suits you. Of course the longer the blade the more coverage of the surface you will get meaning you should be able to finish your plaster more swiftly. The process of finishing off your plaster includes flattening and smoothing the material to ensure an even and consistent finish.
Finishing Trowel
A finishing trowel looks similar to a plasterer's trowel with a wide rectangular blade. We recommend investing in a quality model which will stand the test of time as well as a good bit of hard work. You use the large blade to glide across the plaster to flatten and level it out. Always ensure your blade is clean so as not to press dust or debris into the fresh plaster; it’s a real hassle to remove. Just like your plastering application tools, it is worth looking for a tool with a comfortable grip to make work a little easier for you. Shop Finishing Trowels here >
Spatula
A spatula is an alternative tool that is used to flatten, smooth and finish-off your plaster. The spatula has been more widely used in Europe however is becoming more popular in the UK as a brilliant and flexible tool to slide across your plaster to create a flat uniform finish. Take a look at CES’s Spatulas here >
Rule/Derby
Whilst a rule/derby is used to smooth and flatten the final layer of plaster just as the above tools, it is used in a very different way. This tool is an extra long ruler shape (usually around 1.5meters in length) and you use both hands to control the tool and slide it across the plaster. Due to the length of the rule it flattens walls quickly and makes lightwork of the finishing process. Shop here >
Sponge Float
A sponge float, is a fantastic tool to add to your plastering kit and really is for that final finishing touch. The soft sponge is just the right texture and absorbency to glide over the plaster to blend in lines and remove trowel marks or air pockets. CES offers lightweight sponge floats that will prevent fatigue when you’re using tools all day.>
Plasterer’s Brush
A plasterer’s brush allows you to apply water directly to the walls or ceilings and is used over the final coat. It ensures a flawless finish and prevents the plaster from pulling. A 6” brush is sufficient though avoid the cheaper models as you can find they leave bristles in the plaster which causes a lot of hassle. You may also find this tool useful if you find your plaster setting too quickly, adding water in this method can give you more time to finish. Shop the Plasterer’s brush here >
