Jun
Yes, you can hear it now, that annoying know-it-all colleague pointing out ‘prevention is better than cure’. And no doubt it came at a head-in-hands moment when your machine has tripped out for the third time or the pressure has dropped leaving you unable to spray or the hose has blocked AGAIN. Well we hate to say it, but that ‘annoying colleague’ is probably right. Staying ahead of the game with your rendering machine maintenance, will ensure your machine continues to work at optimum levels and you’re more likely to avoid those ‘I told you so’ mishaps. So how can you maintain your rendering machine to ensure it’s on tip-top form?

Check It Out

Spend 5-10 minutes casting your eyes over your machine is essential for spotting faults and ensuring your machine is all set to go for a day of spraying. It may look slightly different depending on whether you have an electric or diesel machine so we’ll give you some brief guidance on each.
Electric Machines:
For electric rendering machines such as the Euromair MixPro 28, you will require a consistent water feed which is reserved solely for this machine. A water butt is a good option for this. You should also ensure you have a consistent power source dedicated to the machine. This will make sure the machine does not trip out and damage the machine and components. Once you power and water source is sorted, it is good practise to run through the following visual checks:
- Check the electric cable condition
- Ensure the water filter is clear to allow water to run through freely
- Check the water connection and air connections are clean (with seals)
- Ensure the air filters are clear
- Inspect rotor and stator condition
- Assess mixing shaft condition
- Examine whether safety switches operating correctly
- Check grills are fastened down
Diesel Machines:
When using a diesel rendering machine such as a Euromair X-Pro D80, fuel is key when setting up your machine. It is important to ensure your tank is full at the start of the day so your spray is not interrupted. It is also vital that the engine coolant level is topped up since the machine can overheat, cut-out and cause damage to the engine if it runs out. Not only can this mean costly repairs but it will also cost you money in the downtime from your project. Assess all the moving parts (grease points) to check they are moving freely; this will extend the life of your machine. Assess the wear on your rotor and stator; a tell-tale sign that it is time to change it, is when you notice it is not providing enough pressure or the machine is pumping slower. Some rotors and stators may have a ‘jacket’ you can fit which will tighten the stator and provide a little more pumping time though it is also a good idea to keep a spare rotor and stator. Below is a more comprehensive list of exact machine parts to glance over on your Diesel machine before you begin work for the day:
- Hydraulic oil level
- Engine oil level
- Hopper grease nipple
- Motor grease nipples
- Jockey wheel operation
- Product pressure gauge operation
- Pump outlet hose connections
- Hood (canopy) clips lock down safely
- Emergency stop operation
Hoses & couplings
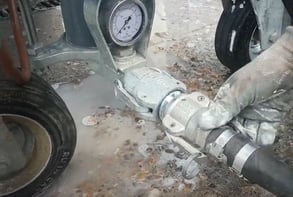 Whatever type of rendering machine you are using, hoses and couplings are essential to check over. Remember to try and reduce the length of your hose as much as possible, placing your machine close to the location of your work; longer hoses make your machine work harder. You should ensure that hoses are clear and in good condition. Blocked or perished hoses can be incredibly dangerous when under pressure as they can easily split. It is crucial to reduce the resistance in the hose as much as possible to allow the material to pass through easily and lessen the strain on the machine. In order to reduce the strain, lubricate your hoses by pumping pure cement or hose primer such as Pump Primer through your hose and then walking it out.
Clean as a Whistle
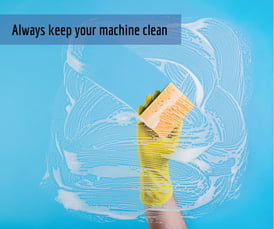 Keeping your machine clean not only improves the professional image of your company but also benefits the performance of your machine and prevents unnecessary strain on your machine. Remember, render is supposed to dry to a hardened state in order to achieve the protective layer on a property. However, dried out and hardened render inside your hoses or mixing chamber is certainly not what you want so don those marigolds and get cleaning. Don't forget CES can supply you with the key rendering supplies such as those crucial sponge balls for hose cleaning.
This is how we would clean an electric machine such as the Euromair MixPro 28 but remember to refer to your own machine manual for more specific instructions.
- Clean the Mixing Chamber: Ensure your machine is unplugged at the mains. Remove the mixing shaft and clean with a metallic brush. Clean the inside of the mixing chamber with water.
- Clean the Material Hopper- Clean this component each time you change your material and at the end of a day of spraying.
- Clean the Delivery Hose- Firstly make sure the machine is not under any pressure, then disconnect the delivery hose to insert your sponge balls. Use a geka to 25mm adaptor to connect the delivery hose to the water pump connection. Select ‘manual’ for the water pump and open the connection to allow the water and sponge balls to run through. Repeat until the water runs out clean.
- Clean the Spray Gun- Remove the spray nozzle and clean with water. Clean the air pipe with supplied gun tube cleaner.
- Clean the Machine Exterior- Use a damp cloth and/or sponge to clean the outside of the machine.
- Drain the water in winter- To prevent water freezing in the machine overnight, disconnect the water supply tubes, open the tap of the system water drain and allow water to drain until empty.
When it comes to Diesel machines such as the Euromair X-Pro D80, we would follow these steps (again please refer to your machine manual for exact guidance)
- Empty the hopper of render. Remove the drain cap to allow wash out of the remaining product with water and allow it to drain from the hopper. Replace the drain ball once the hopper is clean.
- Ensure the machine is NOT under pressure, then disconnect the product hose. Fill the hopper with clean water, feel free to add some washing up liquid to preserve the life of your rotor and stator (as water is not a lubricant).
- Put the machine into pumping mode to clean the rotor and stator.
- Place your sponge ball in the product outlet and reconnect the hose.
- Start your machine to run the ball through the hose. Once the ball has run through, stop the machine and repeat step 4 and 5 until the water is running out clean.
- Once the hopper and hoses are clear you can turn your attention to the body work of the machine. Remember to never use a hose directly on the control panel; simply use a damp sponge.
Superior Service

Finally, servicing your machine with a reputable company on a regular basis will really prolong the life of your rendering machine. CES offer a range of servicing packages and are more than happy to service your machine even if it wasn’t bought from us. With a diesel machine, we recommend booking your first oil change after 50 hours followed by a full service every 150 hours. Always refer to your machine manual for specific guidance on how often to service your machine.
