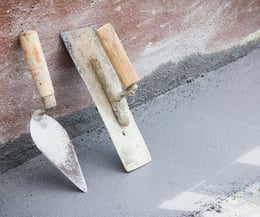
Are you a newbie in the world of plastering? Wondering how to properly wear in your plastering trowel to achieve the best results? Look no further! In this blog post, we will guide you through the process of breaking in your plastering trowel like a pro.

Why should you wear in your trowel?
First and foremost, it's crucial to understand that wearing in a plastering trowel is essential to ensure optimal performance and the very best finish. When you initially purchase a new trowel, it may feel stiff and unyielding with imperfections and sharp unforgiving edges. If you attempt to plaster with a trowel fresh out of the box, you will almost certainly encounter resistance from the tool as well as those sharp edges leaving lines in your finished surface. However, with the right techniques, you can transform it into a reliable tool that glides effortlessly across the surface, delivering flawless results. It's important to note that the wearing-in process takes time and patience. Don't rush it! Dedicate a few hours to work with your trowel on different surfaces, experimenting with different angles and techniques. Over time, you will notice a significant improvement in the trowel's performance and your overall plastering skills.
Breaking it in naturally
 Many plasterers will hold on to a trusty trowel for years and years so it's worth investing in a quality tool. Over time, the tool simply becomes an extension of your arm working with you and adapting your preferences and techniques. Since a trowel is equipped with a metal blade, this will bend and shape with frequent use becoming more responsive. Many plasterers will claim the best way to wear in a trowel is by using it. We recommend using it either for render/sand and cement or on backing coats rather than your final finishing coat that way you can afford those sharp edges that may cut into the material.
Speeding up the wear-process
While you can purchase pre-worn trowels, don't be deceived, even these require some additional work to break them in to the standard to be used to finish your plaster. To accelerate the process of wearing in your trowel you'll need to work on the corners and edges using fine sandpaper a file or on a smooth concrete floor. Start by rounding off the harsh corners using a back and forth rocking motion. Try and complete this sanding process using smooth movements without excessive force which could damage the tool . Once all four corners are slightly rounded, gently smooth and round off all four edges. For a graduated rounding, start by sanding flat along the edges, then move to a 45 degree angle and finally a 90 angle along the thin edge. Use long continuous motions and be aware that this potentially isn't a one-off job as breaking in needs time and repetition for the best results and a flawless finish.
In conclusion, wearing in your plastering trowel is a crucial step to achieve top-notch results. Follow the steps outlined in this blog post, and with practice, you'll master the art of breaking in your trowel. So, what are you waiting for? Gear up and get ready to elevate your plastering game to new heights!
