May
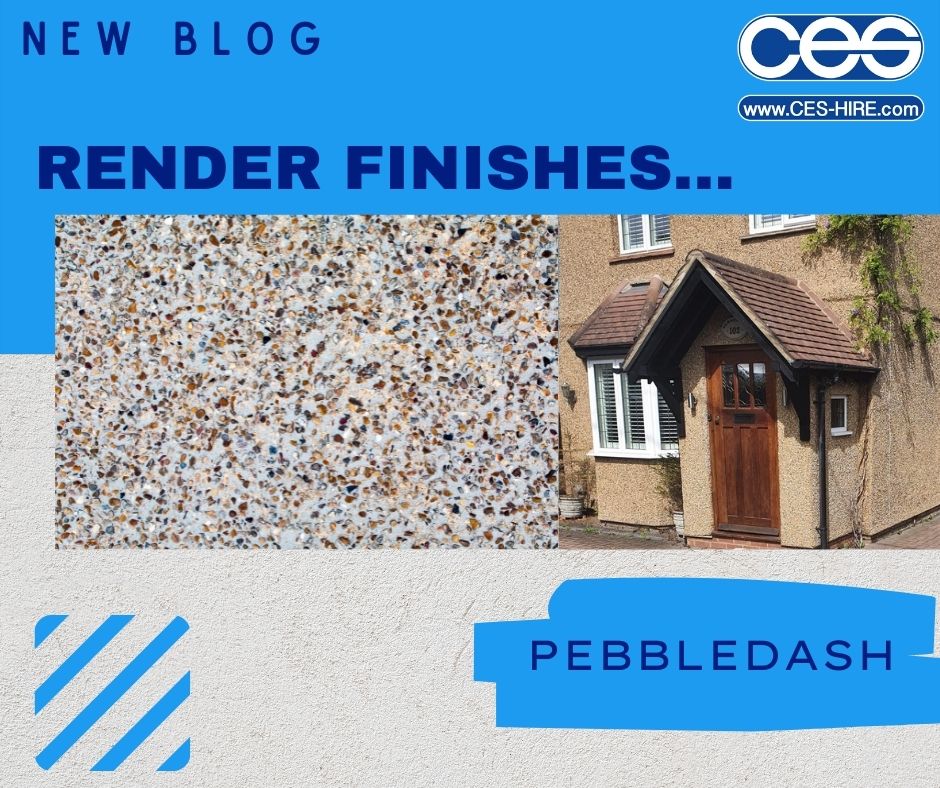
Pebbledash, it’s a little like Marmite, you either love it or hate it. This divisive render finish is sometimes considered an artform as well as being highly valued for the sensible purpose of pebbledash. Others refer to it as ‘slapdash pebbledash’ for it’s historic use when covering up poor brickwork. The Guardian recently referred to it as “both stylish and sensible [when applied in] remote weather-beaten places”.

What is Pebbledash?
 Pebbledash or dry-dash is a method of render finish in which an array of pebbles/small stones/fragments are thrown at wet render and pressed in whilst wet. The aggregate distributed across the wall can be completely bespoke and in fact modern decorative aggregates can create a beautiful unique façade. This finish differs from roughcast render since the colour of the aggregate is visible and applied in a separate stage to the render application. However, with roughcast the aggregate is incorporated into the render mix and applied together creating a textured appearance of all one colour. Read more about roughcast render here >
Where have I seen Pebbledash?
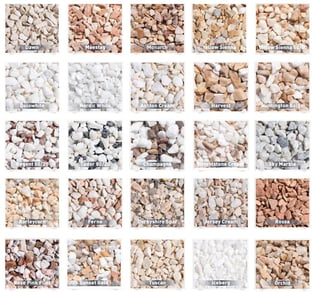
This render finish was very popular in the 1920s-1950s. Amongst the post-war housing boom, houses flew up rapidly and brickies could be unskilled laborers which left houses with poor brickwork. To cover up the slapdash brickwork, pebbledash was used as a quick system to improve the poor workmanship concealed beneath. When you picture pebbledash, most of us visualise that rather boring beige shade adorned with brown speckles that just looks dirty. However, as companies like enewall show, there is a huge range of dry-dash aggregates available that can create a much cleaner, brighter and modern aesthetic (enewall range shown below).
 How to apply Pebbledash?
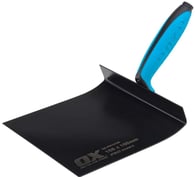
Traditional pebbledash would have been created from a mix of lime, sand, gravel, cement and the all-important pebbles. However, today there are products that make dry-dash application far easier. Weber One Coat dry Dash Receiver is simple to use enabling decorative aggregate to be applied after just one coat. Traditionally a base coat is applied, flattened and smoothed and left to cure with a key to aid adhesion; it can take between 3 and 7 days to cure. A top coat follows on to which the decorative pebbles are applied. With a one coat dash such as Weber’s Dash Receiver, the need for a base coat is eliminated, and the product can be pump applied in just on coat. Once you are ready to apply the decorative aggregate, ensure the pebbles are rinsed, drained and dried and a protective sheet is laid to catch any pebbles and enable them to be reused. A harling trowel is used to throw the pebbles at the wall creating an even coverage. Lightly press in the stones and allow to dry.
What are the benefits of Pebbledash?
The Guardian’s architecture critic, Jonathan Glancey referred to pebbledash as a “prickly mackintosh for a house;” a brilliant descriptive metaphor! This hedgehog-like housing finish really does boast indestructible qualities and will protect your home from those well-known British elements. In exposed rural and coastal environments, pebbledash is a clever technique for weatherproofing your home. Just as all render finishes has great benefits for you home (read more here>), pebbledash really does have amazing water-shedding properties and is incredibly hardwearing and low maintenance. It is a very cost-effective way to alter the appearance of your home that is long-lasting. What other finish could you apply for around £3000 that will last you perhaps 70years?!

What are the downsides of Pebbledash?
We have already mentioned that pebbledash initiates a conflict of opinions with some believing it to be out-dated and old-fashioned. If you were considering removing it, the process is time-consuming and challenging. Whilst render usually provides great insulation qualities for your home, patchy or cracked pebbledash can cause damp, allowing the heat out and water in. It is important to find a skilled specialist to repair your pebbledash to prevent further damp and structural complications. It can be very tricky to match old and new pebbledash so speak to a qualified professional on how best to proceed.
How can you remove or improve Pebbledash?
Pebbledash is tough stuff when it comes to enduring the great British elements and is equally as tough to remove. Removal is costly and the bricks beneath may have hidden costs with potential remedial work needed. Remember not carrying out structural work correctly can invalidate home insurance so it’s important to correct any underlying issues and not simply mask them. The only way to remove pebbledash is to carefully chip it off which is very time consuming and risks damaging the bricks beneath. You should always consult a professional when it comes to removal.
A good and cheaper place to start would be to clean your pebbledash. The dirt that builds up will make the surface appear even more brown so a simple clean can really make a difference. Check for missing stones and any cracks first and fill these damaged areas to prevent water causing further problems. Next spray with a hose and use soapy water and a brush to scrub away the dirt. Perform a second spray to remove the soapy (and probably very dirty) residue.
Painting pebbledash is also one of the easier options to modernise and brighten your home. Whilst it is easier than chipping off the pebbled render, it will still need careful thought since the heavy texture makes painting tricky. We would recommend using a professional spray paint machine and selecting a weather resistant silicone not simply a masonry paint as it must have weatherproof properties.
Rendering over your pebbledash is generally a no-no since firstly it will put additional strain on the original brick structure (which we also know could be compromised by historical poor workmanship already). It also can lock in moisture between the pebbledash and new render which can lead to damp issues. Another option could be installing 20mm external wall installation boards (EWI Store have some great advice if you are considering this).
Machines and Tools for Application

At CES we specialise in render supplies offering both the tools for hand application as well as the machines for spray application. You will need to pump your material more slowly in order to achieve the rough-textured look for pebbledash; for this we would recommend using a diesel Euromair X-Pro D80 (CP80) or a MixPro 50 or MixPro 28. With the smaller electric machines, we suggest you change the rotor and stator to achieve the slower application. A D4-3 Twister Rotor and Stator is a good option for allowing a slower, more controlled application.
