The Rendering Basics
Rendering is quite different to internal plastering, though some of the tools you use will overlap. Rendering not only makes a house look super smart with those pretty patterns and finishes you can achieve but it also has practical benefits. Render will protect against external environmental factors such as sun, rain, wind and extreme temperatures as well as creating sound protection.
 Rendering consists of two coats, the scratch coat and finish coat. The scratch coat provides a foundation for the top coat, creating initial strength and the majority of the waterproofing qualities. The finish coat, as the name suggests is the final top coat which adds the thickness and is the more aesthetic layer. The finish coat requires skill since this is the layer that needs to be flat and straight. A couple of other things to remember when rendering is to ensure the material ratios are exactly right and for best results render between 5-25°C. So, that's a bit of background for beginners but how about the tools needed for rendering? CES can kit you out with the ultimate in Rendering Supplies; here goes...
Trowels
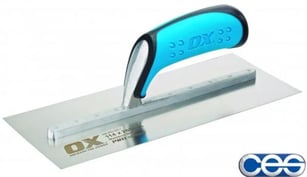
At CES we supply render machines which will replace the need to hand-trowel the scratch and finish coat. However you may be rendering a small area so hand application is just easier than setting up your machine. If you are hand applying a stainless steel towel is a worthwhile investment since it will stand up to weighty render and stand the test of time. Your trowel is one of the key tools for rendering a wall and is simply used to spread the material over the area. Consider purchasing a lightweight trowel with a comfortable grip as it will be a tool you'll come back to again and again and it's worth avoiding pesky blisters. We would recommend The Ox Pro Stainless Steel Plastering Trowel.
 When trowelling on your material we have a couple of tips; firstly dampen the original wall to create a key for the render to adhere to. Secondly, once applied do not over-trowel and play with the material too much as it will pull away from the wall, creating a weakness that could eventually cause cracks. If this has happened a wall may sound hollow once finished.
Scratch Tools
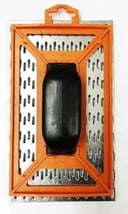
Once you have applied the scratch coat, as the name hints, you must scratch this initial coat. CES's Scratch Back Tools with Plastic Handles is high up on our rendering tools list. Scratching up the base coat creates depressions/a key for the finish coat to grip to. You must be careful that the render doesn't completely dry as it will be impossible to create a decent key. Our Scratch-back tools make quick work of this stage by providing multiple aggressive teeth to easily indent the render as well as a durable stainless steel construction and comfortable grip handle.
 Rules
Rules
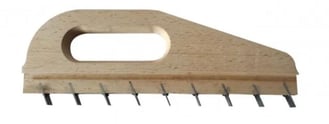
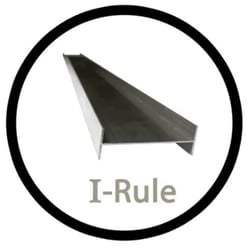
After scratching up your base/scratch coat, you'll be ready to apply the top/finish coat. This layer is applied thicker than the first coat. The same applies as with the scratch coat, apply the material with adequate pressure but don't play with and over-trowel the render. Once you've applied the top coat, it's time to grab your Rule, a crucial piece of kit amongst your rendering tools. A rule is simply a long flat metal bar which scrapes off excess render using its straight metal edge therefore creating a flat, even wall. It is important to rule whilst the render is still wet , working from the bottom pulling the rule upwards scraping any high spots. If there are any low spots or missed areas, this is the time to apply additional render and repeat the ruling task until you've achieved a flat, even wall. CES have a range of Rules to suit you rendering job and would particularly recommend our I-Rule and Toothed H-Rule.
 Floats
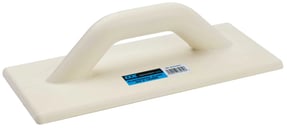
Once your top coat is dry and tough to touch, it is time to get the float out to really get a consistent finish. By holding the float flat to the render and rubbing in circular motions, you will remove any high spots. CES would recommend their Ox Pro Float. A couple of tips for this stage include to rub your float on a concrete block beforehand to break it in and also to mist the render with water if it has become too dry.
Sponges
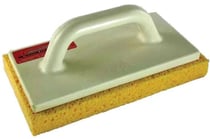
Whilst some customers love the rustic look, other prefer a very polished appearance, which is where your sponge steps in. CES's sponge float would definitely be added to our 'tools to render a wall' list. You'll need to dampen your sponge for this although ensure it isn't too wet as it will cause the render to foam. It works in the same was as your plastic float, rubbing the tool against the render in circular motions. Don't be too heavy-handed, the softer the touch, the smoother the finish. Finishing with a sponge will achieve a beautiful texture on your wall.
Ashlar Cutter
Your customer may request a perfectly smooth, blank canvas of render. However, other customers opt for a more decorative look. An Ashlar Cutter is perfect for this job. The teeth on this tool will create patterns and profiles in the top coat of render which can achieve characterful architectural features on modern buildings. When using your ashlar cutter ensure the render is still green (not completely hardened). Mark out your cuts using chalk and place tomber battens along these lines. Cut along the chalk line to the correct depth (render should be 15mm minimum depth at it's lowest point). Immediately after cutting, use a soft bristle brush to remove the debris.
Anything else?
We could go on forever with so many handy tools required for rendering. Don't forget you'll need various bits and bobs to prep the area too. CES stock a range of polythenes, blue glass window protection and Blue Dolphin Rough surface tape to help you set up your area pre-render. If you have any further questions about your render job, don't hesitate to contact us, we'll be happy to help.


