Jun
Achieving a flawless finish when spraying silicone or thin coat render is all about preparation, consistency, and technique. Even with the best machine and materials, poor spraying habits can lead to patchiness, heavy build-up, uneven texture, or colour inconsistencies that are difficult to fix later.
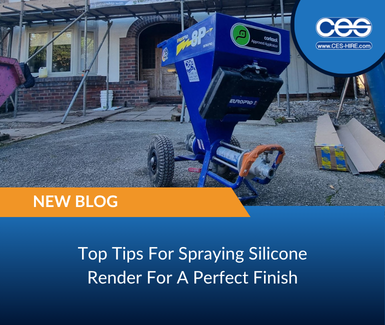
At CES Hire, we work with contractors every day who want the best possible results from their render spray machines. Whether you are using a hopper gun, Euromair DropPro 8P, or a larger render spraying setup, following the right process makes all the difference.

Here are our top tips for spraying silicone and thin coat render properly.
1. Preparation Is Everything
Before you even start mixing product, the first step is making sure the working area is fully prepared.
Silicone and thin coat render can create overspray, especially when spraying larger elevations or working in windy conditions. Protecting surrounding areas properly will save huge amounts of clean-up time and prevent costly mistakes.
 Always make sure you:
- Mask windows and doors
- Protect floors and pathways
- Cover external fixtures and fittings
- Shield neighbouring surfaces from overspray
- Protect vehicles or nearby equipment if working on domestic properties
Good preparation creates a cleaner, faster, and more professional job from start to finish.
2. Mix the Product Thoroughly
Getting the right material consistency is one of the most important parts of spraying top coat render successfully.
Always mix the product thoroughly using a paddle mixer before spraying. This ensures the silicone render is fully blended, smooth, and ready for consistent application through the machine.
 The goal is to achieve a consistency that is wet enough to spray smoothly; almost to the point where it feels like it could run slightly but not too thin. Remember, the material will dry back to create the correct finish.
Weather also plays a major role.
On a hot summer’s day, render can begin curing much faster, which means you may need a slightly wetter consistency to prevent the product drying too quickly during application.
Cold or damp conditions may require slight adjustments too, so always assess the environment before starting.
3. Open the Gun in the Bucket First
 This is one of the simplest but most overlooked tips.
Before spraying onto the wall, always open the gun into the bucket first.
Why?
When the gun first opens, there is often an initial burst of air as the machine picks up the product. If this hits the wall first, it can cause:
- Blobs of material
- Splattering
- Uneven texture
- Visible imperfections
By opening the gun into the bucket first, you allow the material flow to settle before moving onto the wall, helping you achieve a much cleaner start to each spray section.
It is a small step that makes a big difference.
4. Use the Correct Nozzle Size
Nozzle choice has a huge impact on the final finish.

For silicone and thin coat render, we generally recommend using a 6mm nozzle.
This provides:
- Better control
- A smoother finish
- More consistent texture
- Cleaner blending during spraying
Using a larger nozzle may create a much heavier texture, which can be harder to flatten and may not suit the desired finish.
If you are aiming for a finer, more professional top coat finish, the 6mm nozzle is usually the best option.
Always match the nozzle size to both the material and the finish you are trying to achieve.
5. Spray in Consistent Circular Motions
Technique matters just as much as equipment.
 When applying thin coat render, the best finish comes from spraying in smooth, consistent circular motions, overlapping each pass like Olympic rings.
This helps create:
- Even texture
- Better coverage
- Smooth blending between passes
- Consistent material build-up
One important detail many people miss is the direction of rotation.
Your circular movements should always rotate in the same direction throughout the wall.
Changing direction mid-application can create inconsistencies in texture and make the finish look uneven once dried.
Consistency is key.
6. Keep the Gun Parallel to the Wall
 The position of your spray gun is critical.
Always keep the gun parallel to the wall while spraying.
If you begin angling the gun too much, you may notice:
- Patchiness
- Colour variation
- Uneven texture
- Heavy spots
- Inconsistent coverage
Keeping the gun parallel ensures the material hits the wall evenly and creates a uniform finish across the entire surface.
This becomes especially important when working on larger elevations where inconsistencies are much easier to spot once dry.
7. Maintain the Right Distance
 Distance from the wall also affects the finish.
For optimal coverage, keep the spray gun around 500mm away from the wall.
Too close and you risk:
- Heavy build-up
- Overloading the surface
- Uneven texture
Too far away and you may get:
- Poor coverage
- Excessive overspray
- Inconsistent material application
Maintaining a consistent working distance gives you better control and helps create an even, professional finish.
8. Keep the Gun Moving
One of the quickest ways to ruin a finish is stopping mid-spray.
Always keep the gun moving.
Pausing in one spot causes:
- Heavy build-up
- Thick patches
- Visible joins
- Uneven texture
Smooth, steady movement allows the render to lay evenly and blend naturally across the surface.
Think flow, not stop-start.
The cleaner your movement, the cleaner your finish.
9. Extend Past Corners and Reveals
When spraying around corners, windows, and door reveals, avoid stopping directly at the edge.
Instead, extend your spray pass slightly past the corner or reveal.
This helps prevent:
- Heavy build-up on edges
- Visible thick spots
- Uneven texture around openings
Stopping too sharply at reveals often creates obvious lines and material build-up that are difficult to flatten later.
Spraying past the edge creates a cleaner, more consistent finish.
Final Thoughts
Spraying silicone and thin coat render is not just about having the right machine—it is about mastering the technique.
Good preparation, correct material consistency, the right nozzle size, and disciplined spraying habits all work together to create the finish your customer expects.
The best results come from consistency:
consistent mixing, consistent movement, consistent distance, and consistent technique.
At CES Hire, we supply the machines, tools, and advice to help contractors achieve professional rendering results every time.
Because when the finish matters, the details matter most.
