Jul
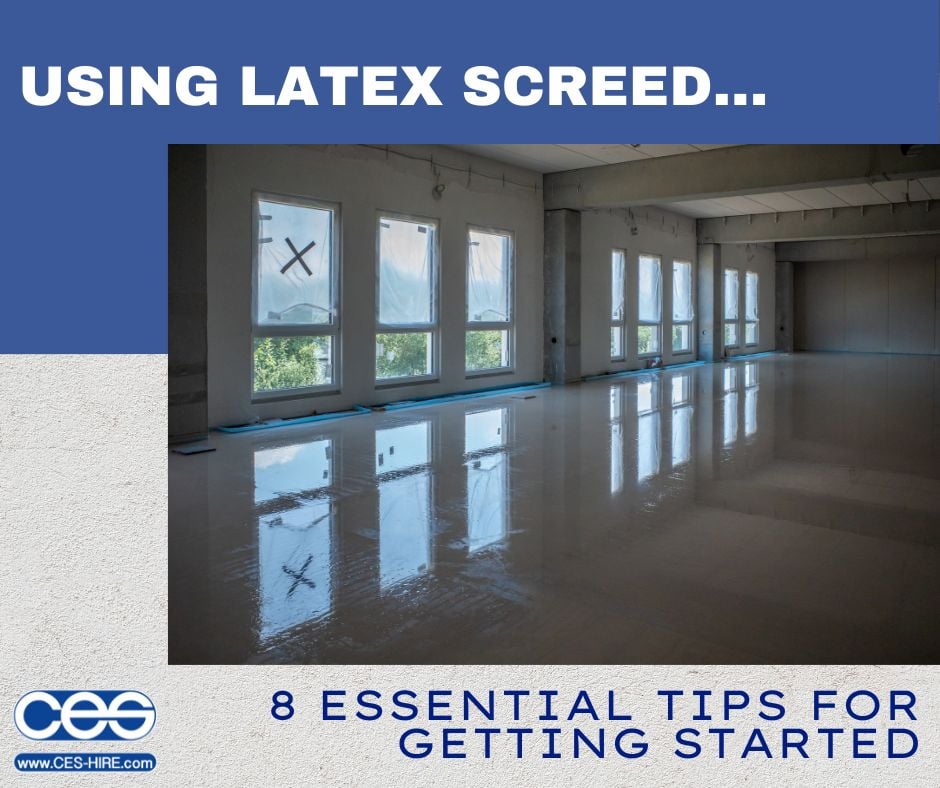
Latex Screed is one of the fastest growing, newest floor trends. Latex screed creates a beautifully flat surface, eliminating any unevenness and improving the structural integrity with a surface of high compressive strength.

A little more about Latex Screed
Also known as self-levelling compound or self-smoothing screed, latex screed benefits from quick and easy installation. allowing light foot traffic after around 2 hours and finished flooring covering can be laid as little as 24hours later (dependent on temperatures and depth laid). It is available as a pre-bagged powder mix which you add water to and can be applied over a variety of subfloors including absorbent surfaces such as sand and cement screed or concrete or non-absorbent bases like ceramic, granolithic, terrazzo, epoxy or polyurethane resins ( such surfaces should be suitably prepared beforehand).
Important
As with any product, your first port of call should always be the specific guidance from the product manufacturer but we have put together some general tips for getting started with your latex screed. This guidance could work with using a product such as Setcrete though be mindful of the depths you are laying at and the environment/temperature as all these factors impact application and curing times.
CES’s Essential Tips
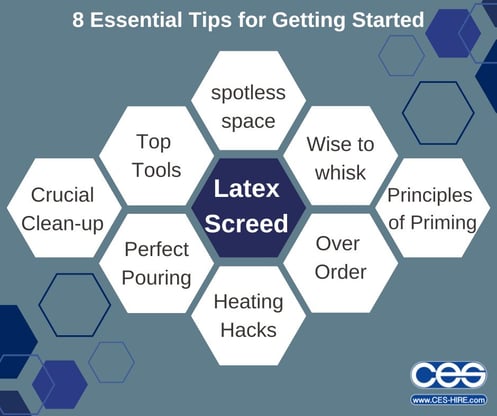
Spotless Space
Before pouring your latex screed ensure your subfloor surface is sound and dry. This means allowing sufficient time for any materials such as sand and cement screed to fully cure. A clean base is also imperative so sand/sweep/hoover the space to remove any contaminants or laitance. Also remember that latex will spread to fill the space, so seal any holes and create dams in doorways to prevent the spread in places it is not required.
Heating Hacks
If you are pouring latex over underfloor heating, turn off the system for 48 hours prior to and 48 hours after installation since the heat will affect natural curing times and could lead to a failed surface or cracking.
Principles of Priming
Priming ensures several things including a good bond with the existing subfloor, a quality finish, preventing pinholing and a steady curing speed. Make sure your primer is fully dry before applying your latex. If you are working with an absorbent surface, you may need to dilute your primer.
Over-Order
It is vital to over order your latex screed as you do not want to be in a position where you run out mid-pour since a new batch mixed significantly later will not bond with the existing screed which will have already set. If you suddenly realise you need a tiny amount such as 1-2mm more screed across the entire surface, you will be surprised as to how many more bags that can equate too. Always store your bags as specified on the packaging and off the floor on a pallet or equivalent to prevent soaking up any moisture from the ground.
Wise to Whisk
Always mix your material in a clean bucket to avoid contamination. You can either use a paddle mixer/power whisk or if you are machine applying this may be done using the machine. You are looking to create a creamy, lump-free consistency, it will take at least 2 minutes to achieve this. Begin mixing slowly so the latex screed doesn’t spray everywhere. It is important to remember not to mix up more material than can be poured in 15minutes since the latex will begin to set at that point.
Top Tools
Latex screed doesn’t take a huge amount of tools to successfully apply due to the free-flowing nature which creates a smooth surface without any subsequent work. It can be worth having a smoothing trowel to hand to level off any areas that aren’t quite perfect. Other than that a couple of good buckets for mixing and cleaning are needed and of course a good paddle mixer/whisk.
Perfect Pouring
Always begin in the corner furthest away from the door, working backwards with your screed pump or bucket so that you don’t step onto or over the fresh screed. Keep your bucket or pump low to the surface to prevent splashing. If you happen to splash a wall, resist the temptation to immediately wipe since a small drop can quickly become a large smudge. It is better to let it dry and scrape it off.
Crucial Clean-up
One of the great benefits of latex screed is the exceptionally quick curing times which allows a project to be completed quicker. However, this can be a disaster for your tools unless you have that clean bucket of water to hand to wash any tools immediately. With the speedy setting times in mind, it is also crucial not to pour any latex screed left-over down the drain as it can quickly set and cause a whole host of issues. Always remove waste in a responsible way.
