
Mar
Rarely would you come across a wall or surface with no complications for your painting project. You will always have edges where the wall meets another wall or the ceiling. You will perhaps have baseboards or mouldings. You could also find plug sockets and switches. All these intricacies may feel like they’re slowing you down. However, with the correct preparation, these things needn’t be a problem.

Do Professional Painters Use Tape?
Painting a room is such a simple way to transform a space. When you spend a great deal of time in your home, it’s important to invest time in updating the look and feel. If you’re itching to make the changes quickly, it can be tempting to grab a paintbrush and go. However, if you do not adequately prepare, you’ll find the entire job may take you longer. You may think that professional painters have the technique nailed and have mastered the steady hand and don’t bother to tape up. That’s where you’re wrong. Professional painters will always prioritise preparation preparing a space by:
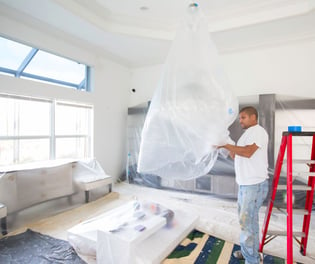
- Moving furniture
- Laying polythene or other protective covering
- Cleaning baseboards
- Dusting walls and removing other dirt
- Applying painters tape
Why use Painter’s Tape?
Painter’s tape is a superb product designed with the latest technology that makes it a superior product to ordinary masking tape. Check out our blog to find out more about the difference between painters tape and masking tape>. So what are the advantages of using painting tape?
- Gives a super professional finish
- Creates crisp and clean bleed-free lines
- Enables you to paint a straight line
- Prevents paint going on moulding, ceiling and baseboards
- Allows you to mask off switches and sockets
- Avoids mistakes of paint ending up on undesired surfaces
- Prevents a long clean up process and correcting of mistakes
- Enables you to paint much more quickly going up to the edges
- Achieves shapes, designs, patterns simply using tape
- Adheres to a range of surfaces (windows, ceilings, walls, furniture)
- Does not leave residue or marks when removed
- Ensures a happy customer
- Find out more about how tape can improve your decorating results here>
How to use Painter’s Tape like a Pro
As with anything, ‘all the gear and no idea’ will never get you the best outcome. However, if you are clued up on the best practice for using your painters tape, the results you can achieve will ensure a very happy customer.
- Always invest in quality tape as it will have the innovative technology to create a barrier that seals the fresh paint and prevents seepage
- Select the right tape for the job depending on the surface you’re applying to e.g. sensitive or extreme
- Ensure you are applying to a clean and dry surface to make sure your tape properly adheres to the area
- Try not to touch the adhesive side as this can contaminate the tape and prevent it from sealing to the surface
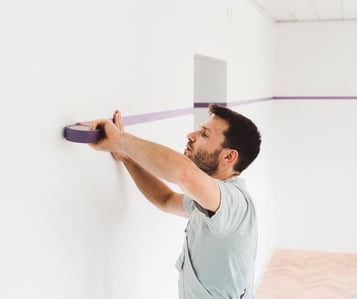
- Don’t cut pieces of tape but simply unroll the tape and use your finger to guide into position
- Use a flat, straight edge (e.g. a putty knife or credit card) to press the tape down and secure in place
- Wait around 60 minutes for proper adherence before you begin painting
- With regards to removal, wait 24 hours to peel off the tape, carefully lifting and pulling back on an angle to ensure a professional result and a clean straight line.
- For further tips and tricks when using painting tape head here >
